How to send an Email
- From home page click on the Send an Email module
- You will see 4 headings ’Content’ ‘Attachments’ ‘Recipients’ and ‘Scheduled’
- In Content (selected by default)
- Put the Subject your ‘email title’
- Type your message in the Email Content
- To attach a document, click on the ‘Attachments’ tab
- Click on Browse and find your document, once selected it will appear on the right-hand side
- Click on the ‘Recipients’ tab
- On the right-hand side under the ‘Available’ box you have 3 options Parent / Student / Staff
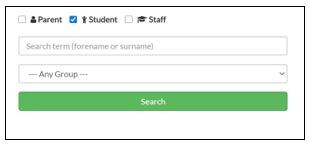
- Here you can search for specific users, keeping the tick in Parent (default), you can select a group at this point, by clicking on the down arrow in ---Any Group--- (so all the parents to children in a specific class or group you have created ), make your selection and then click on Search Or
- If you don’t select a group and just click on the Search button, this will bring all parents up. Or
- you can type a specific name in the Search term (forename or surname) box.
- Once you have made your selection from above always remember to CLICK ON THE GREEN SEARCH BUTTON the parents of the children you have selected will be shown in the ‘Available’ box.
- You can now add all or you can double click on the name or drag across to the box on the right called ‘Selected’
- Scroll back up to the message and on the right-hand side click on the Send Message button, confirm you are happy and send.
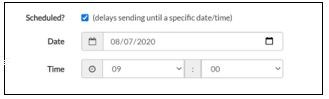
- You can also schedule a message to go out on a certain date and at a certain time.
- Once you are happy with your email and recipients just click on the green ‘Send Message’
- A message will appear to tell you the email has been queued for sending.
- The email will not delete off your screen you will need to click on Home to continue.
- You can check the history of your emails by clicking on Messaging across the top of your screen.
- Here you can see previous emails and scheduled emails, you can also see in here who the recipients were, who sent it and when.