How to Edit Pages
- From the home page click on the Edit Pages module
- In here you will see a list of folders and pages, these are the folders and pages listed in your menu/list of pages on the school website with the omission of the following if you have them as part of your school life package; (these are found as modules on your home page)
- Login
- Newsletter
- News
- Blog
- Calendar
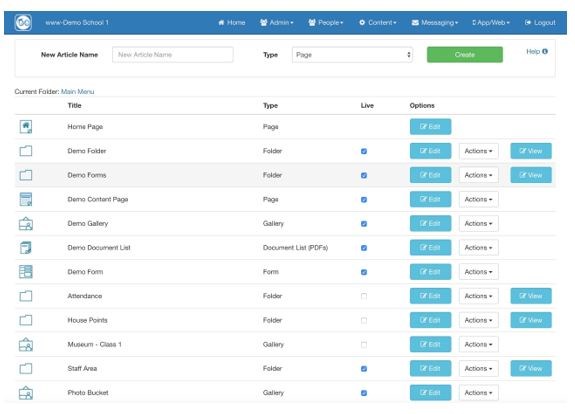
There are several types of content you are able to see or create, these are;
Page – this is a standard web page that can have a multitude of content type contained within it such as text, images, video links etc.
Gallery – this is just for photos (must be jpg’s) and titles.
Folder – for creating structure to the website, for example you could create a class folder with individual class folders and content contained within this.
Document List (PDF’s) – this type of section is for documentation (PDF’s) only, an easy way to manage policies in one place.
Form – so you can create simple contact/survey/forms that are emailed to a nominated email address you type in once they are completed within the app and website.
Hyperlink – these are for easily creating pages that directly link to an external address, you could create a page called Ofsted and link it directly to the Ofsted website for example.
Each type of content above has options to edit them to the right of their name, these options could be ‘Edit’, ‘Actions’ (and could have delete, move and duplicate in the sub menu) and ‘View’ depending on the type of content it is. There is also a tick box option for making the type of content visible within the app or website.
Folders are the only type of content to have a ‘View’ option as this is used to see and then edit the content contained within the folder.
Edit function works in 2 ways, firstly for folders it is the method you use to change the name of the folder and assign access rights (explained later in this document) and secondly for all other content it also gives the ability to edit the content of the section in addition.
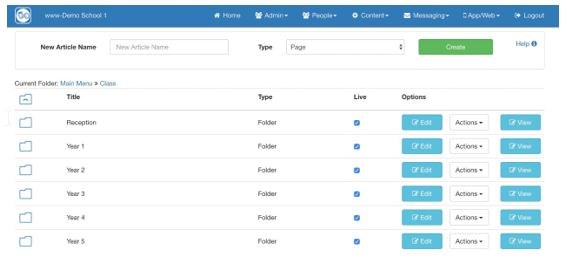
To demonstrate the features, we have created on the demo website, a folder called ’Class’;

Firstly, we select ‘View’ to see what is inside the folder;
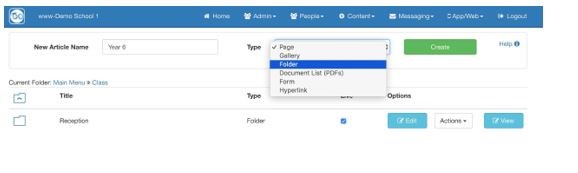
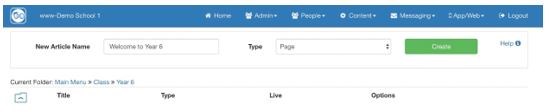
Now we are going to create a ‘Year 6’ folder – at the top of the page, next to ‘New Article Name’ we will type in ‘Year 6’ then we change the ‘Type’ to ‘Folder’
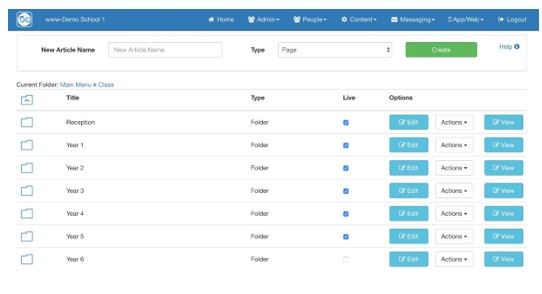
Now we select create and this creates a ‘Year 6’ folder, notice that it is not live.
To add content to the folder, we just select ‘View’, which shows the content of the folder. Create content the same as above for additional folders or any of the other types of content.
Once you have given your article a name and selected the Type, click on the green Create Button.
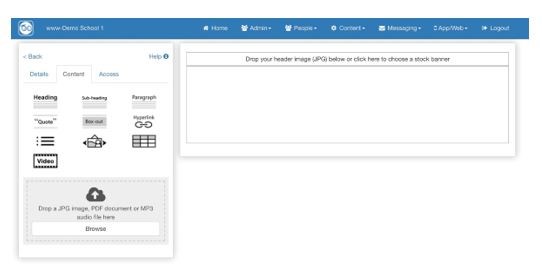
When you click on the ‘Create’ button you are taken directly to the page editor shown on the left. The first tab on the right is called ‘Details’, on this tab you can amend/change the name of the page.

The second tab, ‘Content’, is what we use to add content to the page.
You add content by simply clicking the type of content you require on the left, it then appears on the right for you to edit as needed. The types of content here are;
- Heading
- Sub Heading
- Paragraph
- Quote (text in inverted commas)
- Box Out (text with a colour behind)
- Hyperlink
- Bullet points
- Carousel (automatically creates a slide show of jpg images placed within the carousel box)
- Table
- Links to YouTube videos
- You can also lace individual jpg images, PDF’s and MP3 files
Once you have created some content on the page you can also drag and drop items to change their order on the website. You can also drag over additional bits of content to specific places on the page.
To edit existing content, you just have to double click the content, the focus of the screen will then be the box you just selected;
Before you double click the ‘paragraph’ box
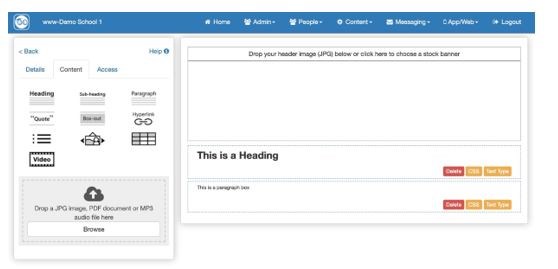
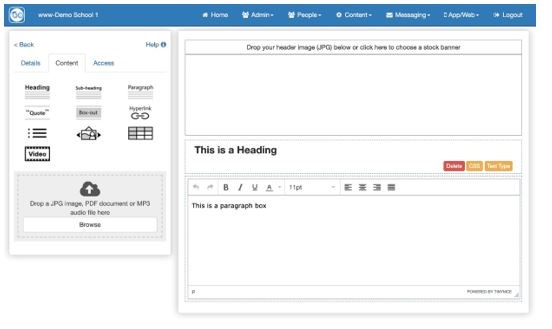
After you double click the ‘paragraph’ box
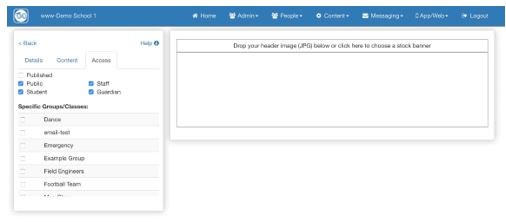
The last tab defines if it is live and who is able to view it;
So for example, you can set the page live and only show the page to the parents of the children in your class by removing the tick from ‘Public’ and then ticking the class name.